Difference between revisions of "FreeNAS/Installation"
m (Tag: Visual edit) |
m |
||
| Line 61: | Line 61: | ||
=== NextCloud Install === | === NextCloud Install === | ||
Check [https://forums.freenas.org/index.php?threads/how-to-owncloud-using-nginx-php-fpm-and-mysql.17786/ Setting Up Owncloud on FreeNAS] | Check [https://forums.freenas.org/index.php?threads/how-to-owncloud-using-nginx-php-fpm-and-mysql.17786/ Setting Up Owncloud on FreeNAS] | ||
| + | |||
| + | NOTES FROM TEST: | ||
| + | |||
| + | Jails: | ||
| + | |||
| + | Create Standard Jail; no check boxes besides autostart, we need that. | ||
| + | |||
| + | Within jail, need to update pkg: | ||
| + | <pre> | ||
| + | # portsnap fetch extract | ||
| + | # cd /usr/ports | ||
| + | # make deinstall; make reinstall | ||
| + | # pkg update | ||
| + | </pre> | ||
Revision as of 21:05, 29 August 2016
This guide is how to install the FreeNAS OS on the Archive Server.
These are, at first, notes from a VirtualBox test setup, and then confirmed in the production environment.
Install FreeNAS on USB using Win32USB or Unetbootin
Set BiOS to read USB drive FIRST. Keep USB Key forever in the same slot to make things easy.
Contents
Run FreeNAS for the First Time

Console Screen
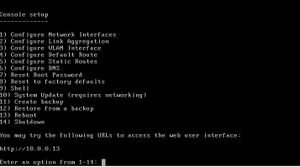
Let everything load and you'll be greeted with the Console Screen.
We have to manually set the IP Address. Our network will probably give you the right IP address to use, but we need to make it static.
Select 1
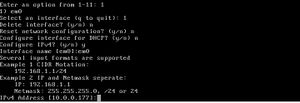
It will list available network interfaces. The Archive/Nextcloud Server has 2 available network ports. You should find and connect to the eth0 port.
Since we're using eth0, type 1 and hit Enter
Delete Interface: N
Reset network configuration: N
Configure interface for DHCP? N
Configure IPv4? Y
Interface name: eth0
Configure IPv4
After making note of the IP address given at the beginning, reassign it with that same IP address. Set the NetMask to 255.255.255.0 (the same as any regular machine on the network)
Configure DNS
Set up DNS as below:
Logging In for the First Time
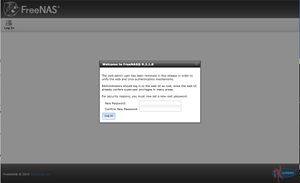
If you did everything right, and navigate to the IP Address listed on the console, you should be greeted with the below screen:
You need to create the root password.
Make it strong, this is the root account, meaning it has God-like control over the computer and is accessible from the internet!
MAKE THE PASSWORD STRONG!
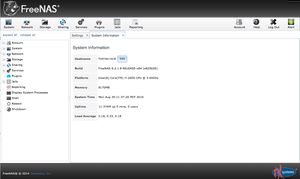
Once you set the password, you'll be taken to the the FreeNAS main screen.
Change the Hostname from freenas.local to SETV-005-CLOUD.ssdcougars.org
Insert steps on adding it to school's domain
NextCloud Install
Check Setting Up Owncloud on FreeNAS
NOTES FROM TEST:
Jails:
Create Standard Jail; no check boxes besides autostart, we need that.
Within jail, need to update pkg:
 # portsnap fetch extract
 # cd /usr/ports
 # make deinstall; make reinstall
 # pkg update


